Sky/ground blending in images with vegetation on horizon
Here is an example of how to adjust the sky/ground transition in an image with a lot of light pollution and vegetation on the horizon:
1. Result with default adjustments
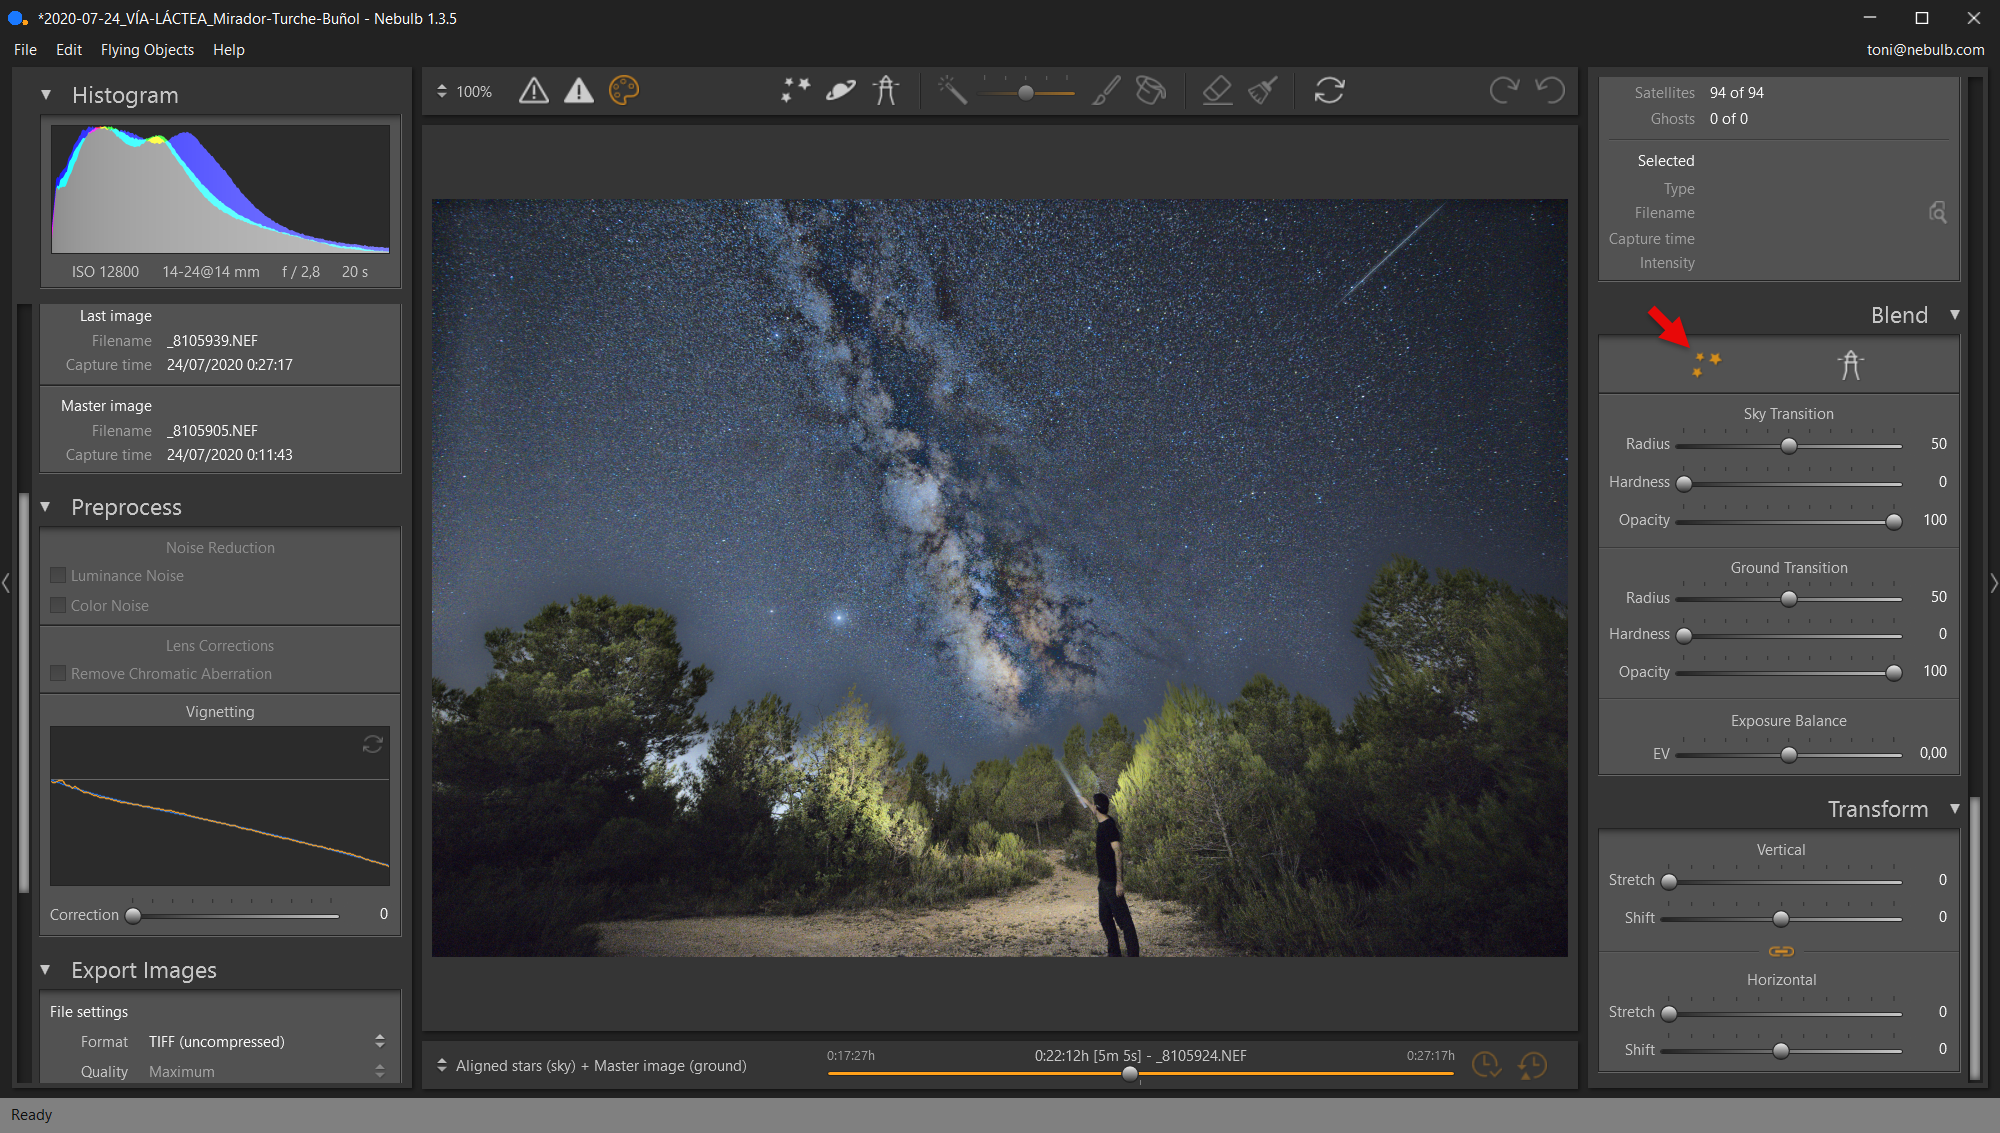 When there is large vegetation on the horizon (such as trees nearby) and, in addition, there is also a lot of light pollution in the background, what happens is that the sky/ground transition is very noticeable (the image looks quite odd because the illumination behind the trees does not match that of the sky). As the trees are not completely opaque, but let you partially see what is behind them, it is crucial in these cases to adjust well the sky/ground transition so that the image looks good and nothing weird can be seen in the horizon area.
2. Adjusting the sky transition
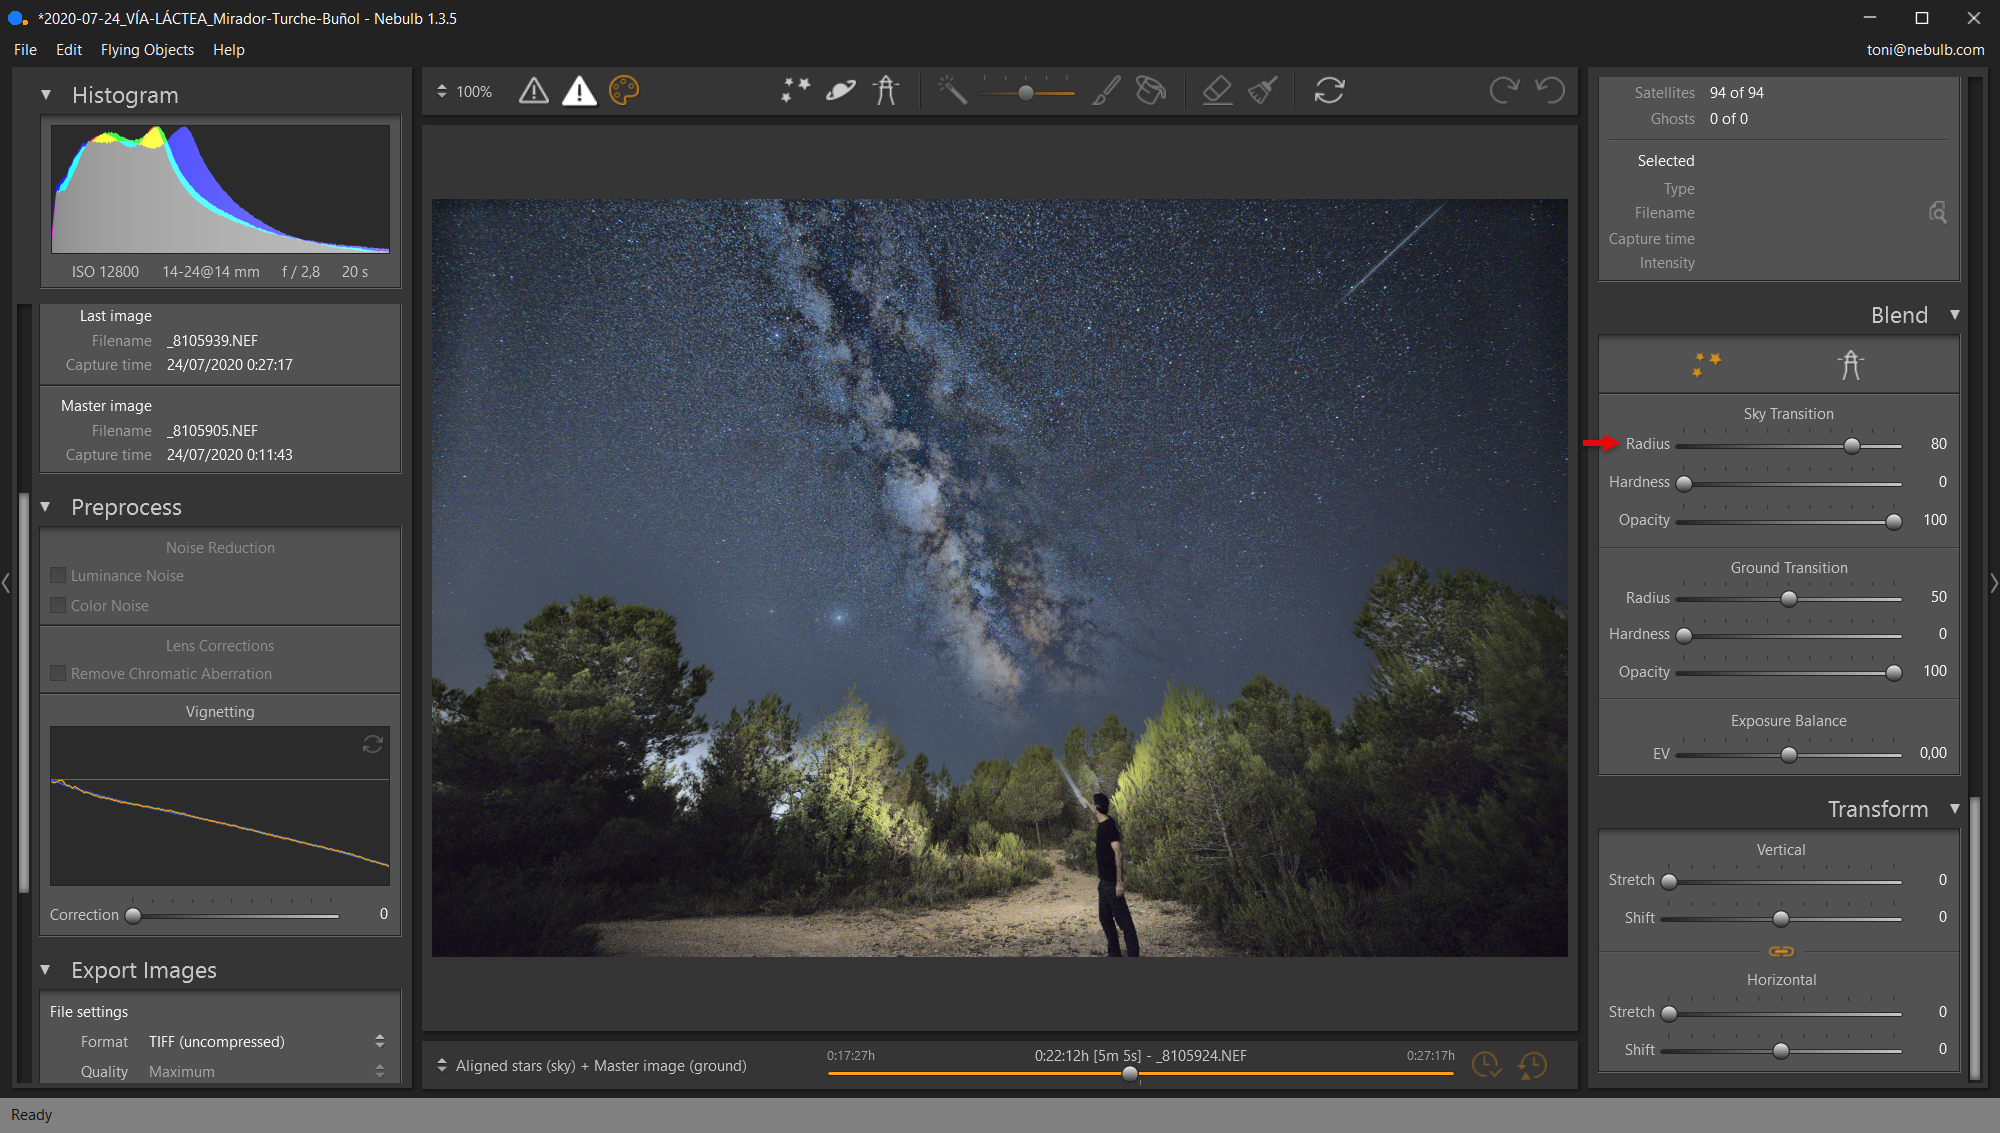 As always, the first thing to do to start adjusting the sky/ground transition is to try the "Radius" and "Hardness" settings for the sky. In this case the radius has been increased a bit to make the sky transition larger (with the idea of starting to generate a smoother sky to ground transition).
3. Adjusting the exposure balance
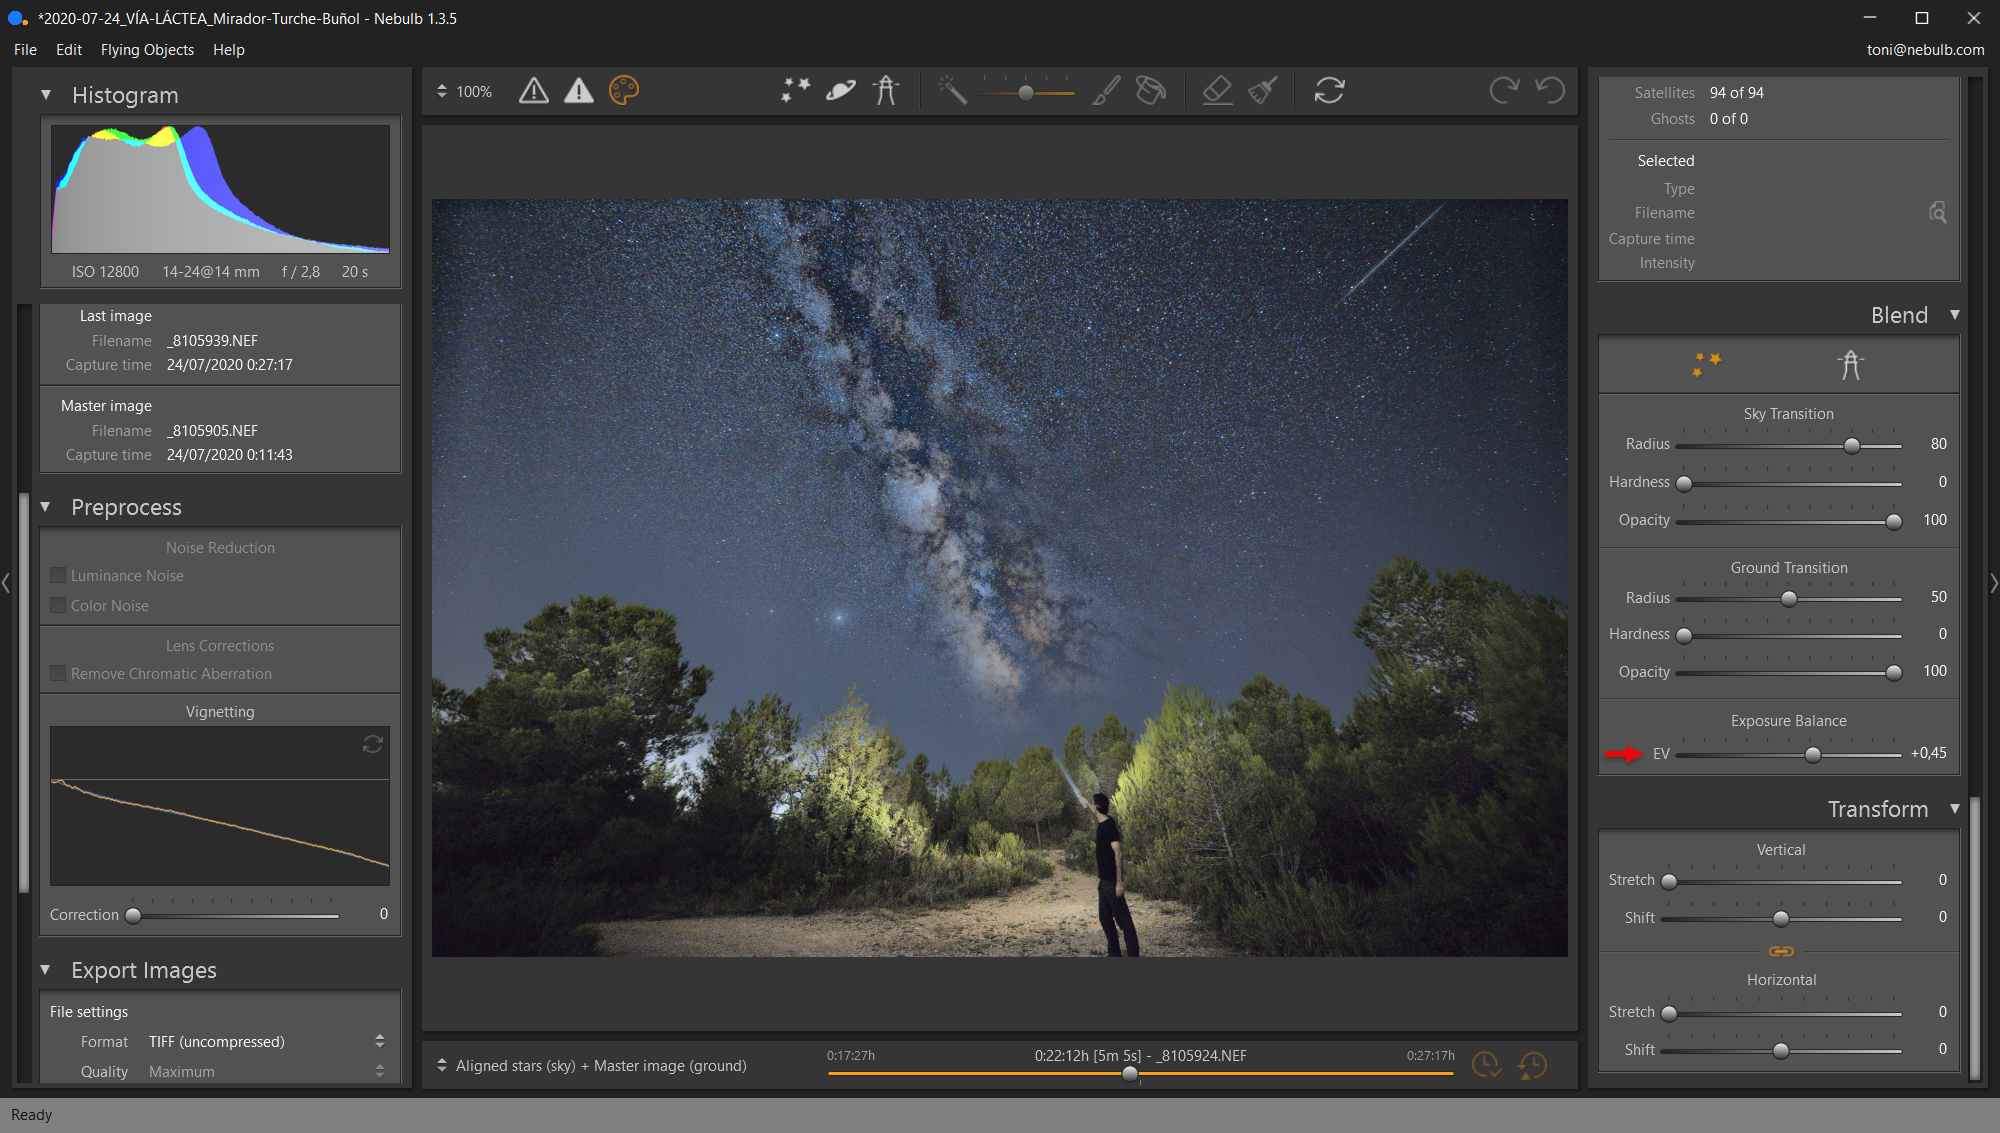 The next step is to adjust the exposure balance to try to match the brightness of the sky with the ground. In this way the exposure balance has been increased a little (+0.45 stops) to make the sky part a little lighter and thus start to match it with the background behind the trees.
4. Adjusting the ground transition
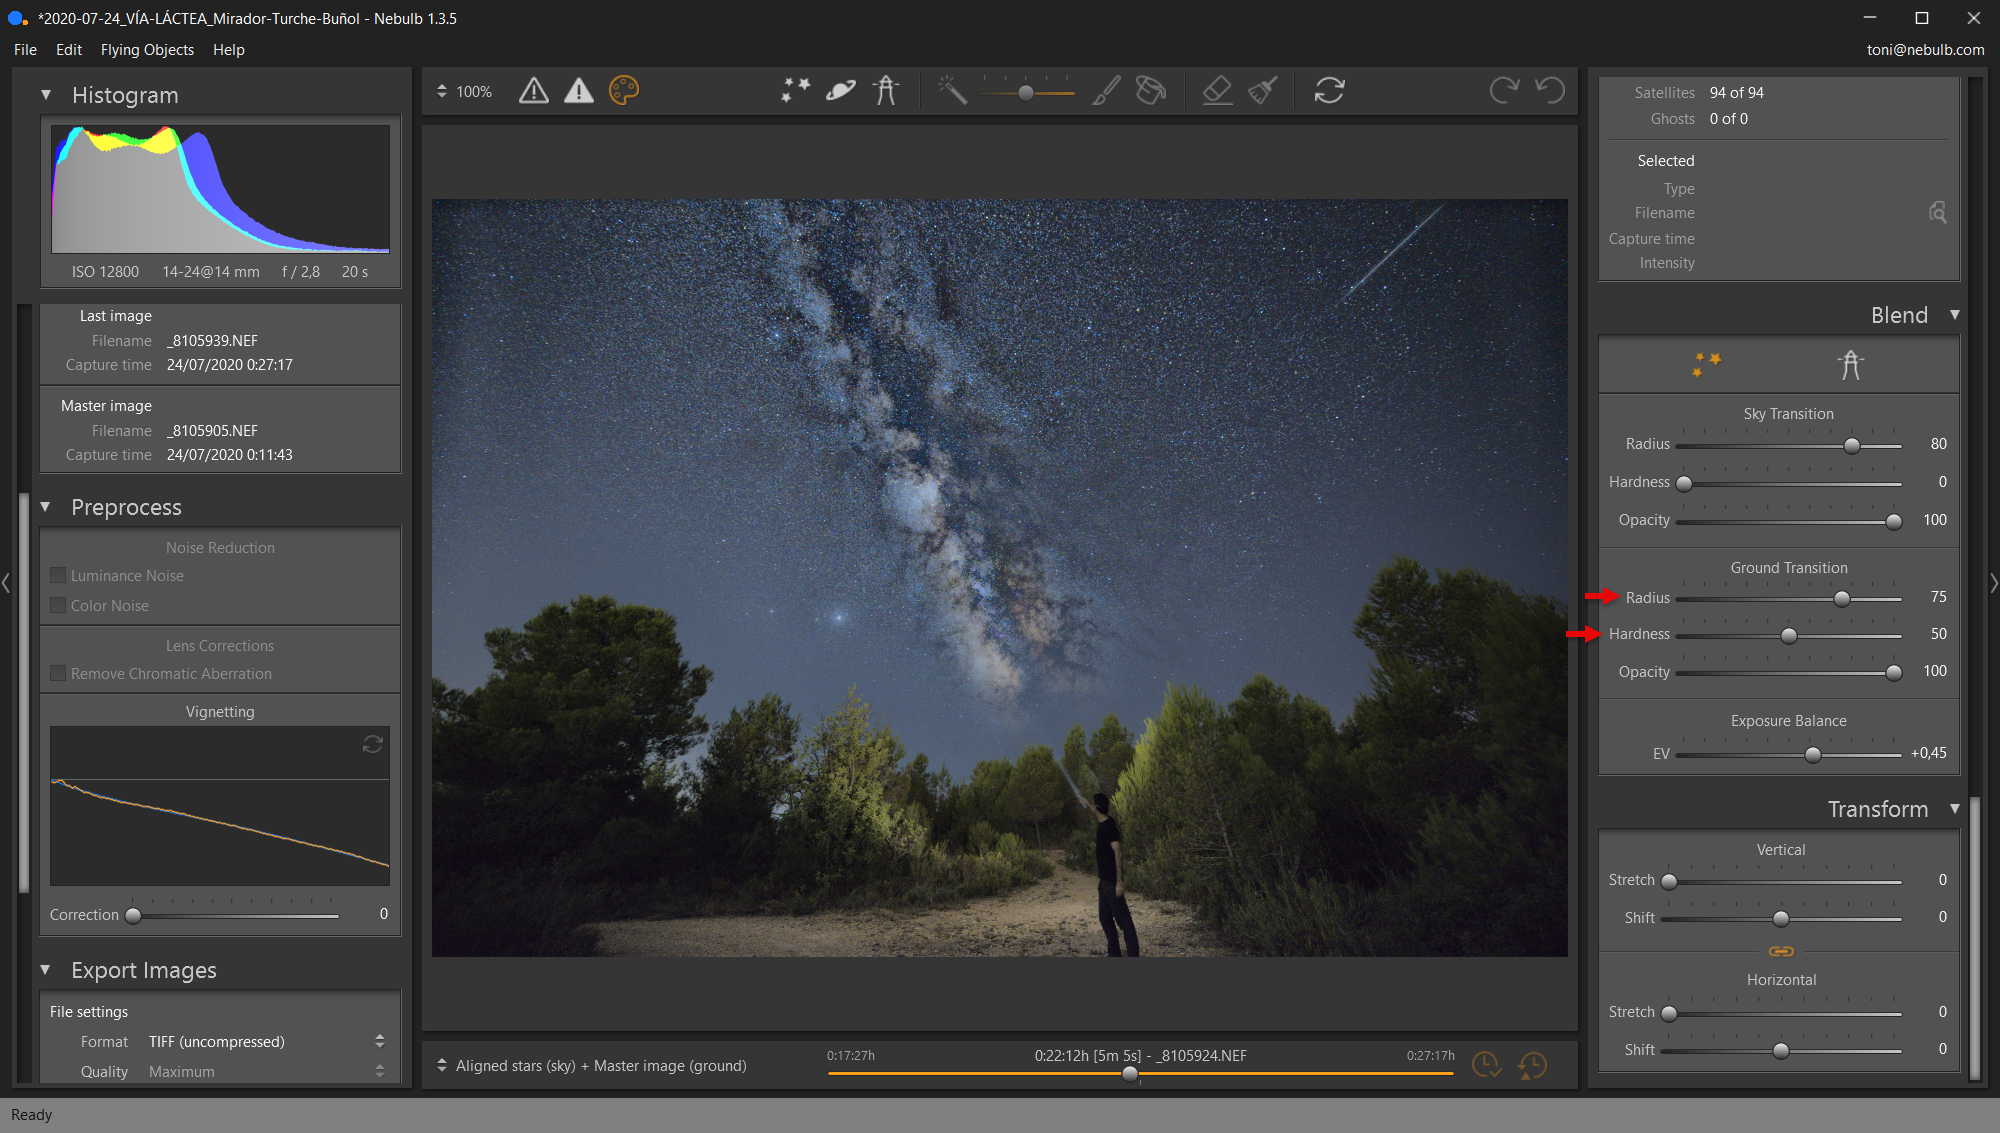 By increasing the radius (75) and the hardness (50) of the ground transition, together with the adjustments made in the previous steps, the brightness behind the trees is definitely balanced with that of the sky, resulting in a much more natural image.
5. Adjusting the opacity of the sky
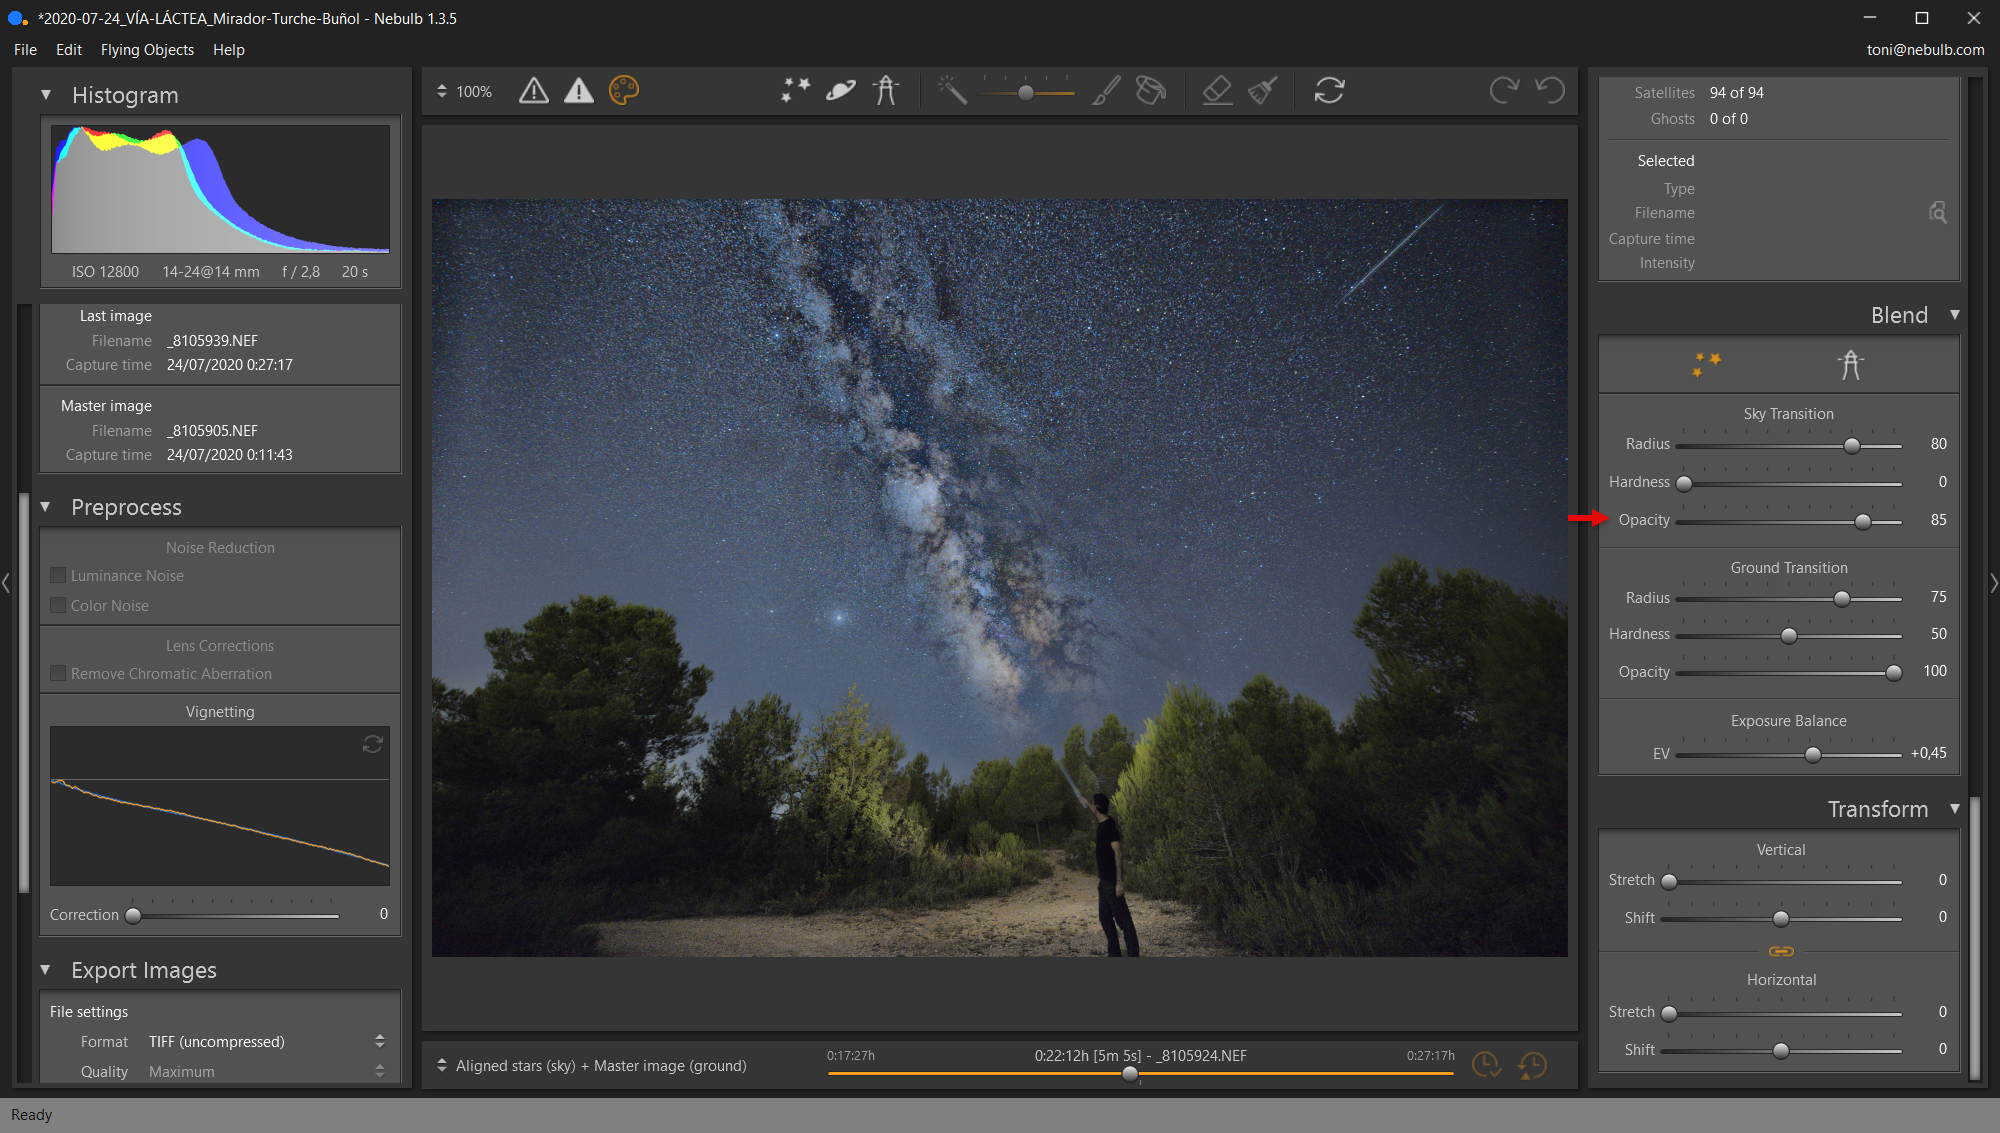 Finally, the opacity of the sky is slightly reduced, as this works especially well when there is vegetation on the horizon. In this way, it is finally possible to obtain an image in which the transition from the sky to the ground is completely natural (despite the initial drawback of having trees and a lot of light pollution behind).
 In this region zoomed to 100% you can see in detail the sky/ground transition obtained, thanks to which the final image is perceived in a natural way (without weird discontinuities of brightness between the sky and the ground).
Related Articles
Sky/ground blending in star trails images
The sky/ground blending in star trails images is done in the same way as in aligned star images, except that in star trails you have to be especially aware of which image is used for the ground part. Thus, if you drop down the image selection list ...
Sky/ground blending (general explanation)
Nebulb works internally with one image for the sky and another for the ground, on which, in addition, different adjustments can be applied, such as, for example, light pollution reduction (which is only applied to the sky part). Because of the latter ...
Sky/ground blending in star trails images with trees above the horizon
In the case that in a star trails image there are trees (vegetation) protruding above the horizon it is very convenient to select the maximum image for the ground (to get the most natural result possible). Below you can see the difference between ...
Sky/ground blending in images with subjects protruding above the horizon
In addition to the mask for the sky, in Nebulb it is also possible to define a mask to improve the blending of those elements that protrude predominantly above the horizon. How to define the mask for objects protruding above the horizon Here are the ...
Sky/ground blending in images with flat horizon
Here is an example of how to adjust the sky/ground transition in an image with a flat horizon: 1. Result with default adjustments Image obtained with the default settings of the "Blend" module. The result is acceptable, but the sky/ground transition ...